In This Article
Starting your journey with revell model kits for beginners doesn’t have to feel overwhelming. Walking into a hobby store and seeing hundreds of boxes with different skill levels, scales, and subjects can trigger decision paralysis. But here’s the truth most stores won’t tell you: picking the wrong first kit can turn an exciting new hobby into a drawer full of half-finished frustration.
I’ve spent years watching newcomers make the same expensive mistakes. They grab the flashiest box or the cheapest option, only to discover missing tools, confusing instructions, or parts so tiny they need tweezers and a magnifying glass. The right revell model kits for beginners solve all these problems upfront.
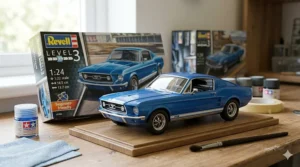
Revell has earned its reputation by understanding what beginners actually need: complete starter kits with paint, glue, and brushes included. Their skill level system takes the guesswork out of selection. Level 1 and 2 kits offer snap-together designs perfect for first-timers, while Level 3 introduces basic painting and gluing without the complexity that causes burnout. What makes Revell particularly beginner-friendly in 2026 is their innovative Easy-Click system that eliminates glue entirely through precision-engineered snap-fit connections.
Beyond just building something, these kits develop patience-building hobbies that strengthen fine motor skills and boost concentration. Research shows that model building techniques improve hand-eye coordination by up to 40% while providing stress relief comparable to meditation. You’re not just assembling plastic; you’re training your brain to focus, problem-solve, and appreciate the satisfaction of completing something tangible in our increasingly digital world.
Quick Comparison Table: Top Revell Kits at a Glance
| Model Kit | Skill Level | Parts Count | Scale | Best For | Price Range |
|---|---|---|---|---|---|
| VW Beetle Starter Kit | 3 | 50+ | 1:32 | First traditional build | $15-$25 |
| Titanic Easy-Click | 2 | 156 | 1:600 | No-glue experience | $25-$35 |
| Messerschmitt Bf-109 | 3 | 37 | 1:72 | Aviation enthusiasts | $20-$30 |
| P-51D Mustang Starter | 2 | 34 | 1:72 | History buffs | $18-$28 |
| F-15E Strike Eagle | 3 | 65+ | 1:72 | Military jet fans | $22-$32 |
| Spitfire Mk.IIa | 2-3 | 45+ | 1:72 | British aircraft lovers | $20-$30 |
| James Bond Aston Martin | 2 | 70+ | 1:24 | Movie car collectors | $18-$28 |
Looking at this comparison, the pattern becomes clear: starter kits in the $18-$32 range deliver everything needed without requiring separate purchases. The Titanic Easy-Click offers the simplest entry point with zero glue required, while the VW Beetle provides the most authentic traditional modeling experience for those willing to tackle Level 3. Part counts matter less than you’d think—the Titanic’s 156 pieces assemble faster than the Beetle’s 50 because snap-fit connections eliminate drying time between steps.
💬 Just one click — help others make better buying decisions too! 😊
Top 7 Revell Model Kits for Beginners: Expert Analysis
1. Revell Starter Kit VW Beetle
The 1:32 scale VW Beetle represents the gold standard for traditional model building entry. What newcomers miss about this kit is how perfectly Revell balanced complexity with completion time—you’re looking at 3-6 hours from opening the box to displaying your finished model, which hits the sweet spot for maintaining interest without overwhelming patience.
This kit includes everything: the detailed plastic model with movable wheels for added realism, three base colors in Revell’s water-based Aqua Color formula (low odor, beginner-friendly), modeling glue, a precision brush, and decal sheets with license plates from eight countries. That last detail matters more than it seems—choosing between German, American, or British plates gives you a sense of ownership and customization from your very first project.
The 1:32 scale delivers surprising detail without requiring magnification or advanced painting techniques. Each body panel shows authentic curves and the iconic rounded silhouette that made the Beetle a cultural phenomenon. For beginners nervous about painting, Revell’s three-color approach covers the essentials: body color, trim, and interior basics. You won’t achieve show-quality finishes on your first attempt, but you’ll create something unmistakably recognizable.
Customer feedback consistently praises the fit of parts—pieces align without excessive sanding or filling, which prevents the frustration that kills many first projects. Several reviewers mentioned completing this as a weekend father-son project, with kids handling assembly while parents tackled painting details.
Pros:
- Complete starter package eliminates separate purchases
- Movable wheels add interactive element after completion
- International decal options provide personalization
- 1:32 scale offers detail without overwhelming complexity
- Water-based paints are forgiving and easy to clean up
Cons:
- Level 3 requires gluing precision some beginners find challenging
- Limited part count means fewer assembly steps (some builders want more complexity)
Around $15-$25 makes this exceptional value when you calculate that buying glue, paint, and brushes separately would cost nearly the same amount. The Beetle offers more than nostalgia; it teaches fundamental skills you’ll use on every future model.
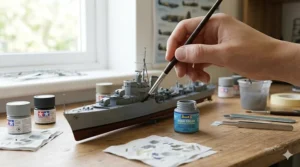
2. Revell RMS Titanic Easy-Click
The 1:600 scale Titanic revolutionizes beginner model building by eliminating glue entirely. Revell’s Easy-Click system uses precision-molded parts that snap together with satisfying clicks—no chemical fumes, no waiting for adhesive to dry, no accidentally gluing your fingers together at 2 AM because you were too excited to wait until morning.
This 156-piece kit might look intimidating to absolute beginners, but the part count misleads. Because there’s no glue, you can assemble sections in any order and make corrections without destroying the model. The structured hull planking and detailed deck provide visual texture that looks impressive without requiring painting—though the included decals and stickers add authenticity for those who want it.
What the spec sheet won’t tell you: this model teaches spatial reasoning better than traditional kits because you’re building from the waterline up, learning how deck levels stack and support structures interconnect. The display stand included creates an instant centerpiece for your bookshelf or desk. At 448mm length (about 17.6 inches), it commands attention without dominating the room.
Customer experiences split between two camps: parents building with 10-12 year olds report completing it in one focused afternoon, while solo builders mention spreading it across several evenings to savor the process. A few reviewers noted some smaller pieces require delicate handling—the ship’s railings and small details aren’t toys for rough play—but this teaches care and precision rather than being a legitimate weakness.
Pros:
- Zero glue required makes it mess-free and beginner-perfect
- Large scale creates impressive display piece
- Structured deck planking adds realistic texture
- Includes both waterslide decals and stickers for flexibility
- Display stand included for immediate exhibition
- Correctable assembly allows learning without permanence
Cons:
- Smallest pieces require careful handling
- Some snap-fit connections need firm pressure that worries beginners about breaking parts
In the $25-$35 range, you’re paying slightly more than glue-required kits but saving the cost of adhesive and eliminating the learning curve of proper glue application. For families or anyone hesitant about chemical adhesives, this delivers maximum impact with minimum risk.
3. Revell Starter Kit Messerschmitt Bf-109 G-10
Aviation history meets beginner-friendly design in this 1:72 scale German fighter. The Bf-109 dominated WWII skies with over 35,000 units produced, and Revell’s starter kit captures why this aircraft earned legendary status without requiring advanced modeling skills.
This Level 3 kit includes 37 carefully engineered parts, basic colors matched to historical schemes, Revell glue, a precision brush, and decals for two authentic versions. That dual-version option teaches an important lesson: research and reference checking. You’ll learn to examine photos and choose between different squadrons or time periods, adding depth beyond just following instructions.
The landing gear offers optional positioning—you can display it wheels-up in flight configuration or wheels-down as if parked on an airfield. This simple choice introduces the concept of dioramas and scene-setting that separates basic assembly from true modeling. The detailed cockpit with instrument panel gives you a legitimate painting challenge without overwhelming complexity.
What experienced builders know but beginners discover: 1:72 scale aircraft offer the best balance of detail versus build time. Larger scales require more painting precision; smaller scales hide mistakes but also hide details. The 137mm length (about 5.4 inches) with 156mm wingspan fits comfortably in display cases while maintaining visible panel lines and surface details.
Customer reviews emphasize how the color callouts in the instructions guide beginners through historically accurate painting. Several mentioned this as their gateway to researching WWII aviation, transforming a simple hobby into educational exploration.
Pros:
- Dual decal options teach research and decision-making
- Optional landing gear positions introduce scene-setting concepts
- Detailed cockpit provides genuine painting challenge
- Historical significance adds educational value
- 1:72 scale perfect for display without dominating space
Cons:
- Level 3 gluing requires patience and steady hands
- Small cockpit parts challenge those with vision issues or shaky hands
Around $20-$30 positions this as mid-range pricing with above-average educational value. The included paints and tools mean you’re ready to build the moment the box opens.
4. Revell Starter Kit P-51D Mustang
The P-51 Mustang earned its reputation as one of WWII’s finest fighters, and Revell’s 1:72 scale starter kit makes this legend accessible to beginners. With 34 parts, this represents the sweet spot for newcomers: enough complexity to feel accomplished, few enough pieces to complete in an afternoon without losing momentum.
This Level 2 kit steps down the difficulty from the Bf-109, making it ideal for absolute first-timers nervous about gluing. The movable propeller adds tactile satisfaction—after displaying your finished model, you can actually spin the prop, connecting the static display to the dynamic machine it represents. The detailed instrument panel surprises beginners with how much character a few millimeters of painted detail can provide.
Included in the box: the plastic model, paints in authentic USAAF colors, glue, brush, and decals for a specific squadron marking (359 FG, 368 FS, 8th AF, East Wretham, England, 1945). That precise historical detail transforms your model from “a P-51” into “the P-51 that flew from East Wretham in 1945″—a subtle shift that deepens connection to the subject.
The additional fuel tanks under the wings tell a story most beginners miss until they research: these extended the Mustang’s range to escort bombers deep into German territory, fundamentally changing the air war. Building this model becomes an entry point into understanding engineering solutions to tactical problems.
Customer feedback highlights the straightforward assembly process and clear instructions. Several parents mentioned building this alongside kids as young as 10 with supervision, noting the limited part count prevents the “too many pieces overwhelming the table” problem that derails family projects.
Pros:
- Level 2 difficulty perfect for absolute beginners
- Movable propeller adds interactive element
- Specific historical markings provide educational context
- Low part count enables completion in single session
- Additional tanks add visual interest and historical authenticity
Cons:
- Single decal option limits customization compared to dual-marking kits
- Small scale means fine detail work on cockpit requires good lighting
The $18-$28 price point makes this one of the most affordable complete starter kits available, delivering authentic WWII aviation history without requiring advanced skills or separate tool purchases.
5. Revell Starter Kit F-15E Strike Eagle & Bombs
Modern military aviation enters the beginner realm with this Level 3 starter kit. The F-15E represents current operational aircraft still flying missions in 2026, giving this model immediate relevance beyond historical interest. What sets this kit apart: it includes complete weapon loadout with four Sidewinder missiles, two GBU-10 bombs, two GBU-15 bombs, and external fuel tanks.
This matters because weapon pylons teach assembly complexity without overwhelming difficulty. Each missile and bomb attaches to hardpoints with small pegs—simple mechanically, but it introduces the concept of secondary details that elevate models from basic builds to realistic replicas. You’ll learn to paint small objects separately before attachment, a fundamental technique for advanced modeling.
The kit contains everything needed: detailed plastic model, base colors, glue, brush, and decals for an authentic version (AF 89-0487 “10,000 hours”). That “10,000 hours” designation refers to a specific airframe that reached a maintenance milestone—the kind of insider detail that makes military modelers smile. Finely engraved panel lines provide realistic surface texture that shows up beautifully with proper painting techniques.
At 1:72 scale, this balances impressive presence with manageable size. The two-seat cockpit offers double the painting detail compared to single-seaters, letting you practice figure work on both the pilot and weapons systems officer positions.
Customer reviews from military aviation enthusiasts praise the weapon variety, noting that most beginner kits skip ordnance entirely. A few mentioned that the multi-piece bomb assemblies require careful alignment, but framed this as excellent practice rather than a frustration.
Pros:
- Complete weapons loadout teaches secondary detail assembly
- Represents currently operational aircraft (relevant in 2026)
- Two-seat cockpit provides extra painting practice
- External fuel tanks and bombs add visual complexity
- Finely engraved panel lines reward proper painting techniques
Cons:
- Level 3 requires gluing precision for multi-part bombs
- Two-seat cockpit doubles the fine detail painting workload
In the $22-$32 range, this costs slightly more than simpler kits but delivers significantly more building experience. The weapons alone provide learning opportunities you won’t find in basic aircraft models.
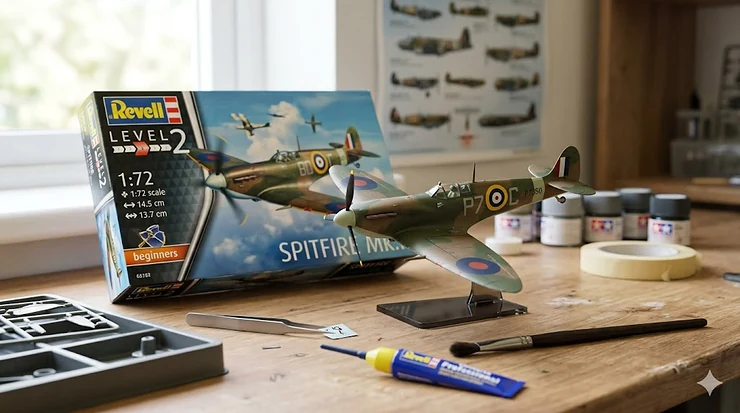
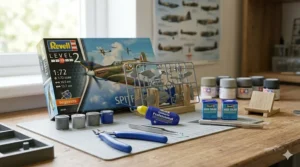
6. Revell Starter Kit Spitfire Mk.IIa
The Spitfire symbolizes British determination during the Battle of Britain, and Revell’s starter kit makes this icon accessible without requiring expert skills. Rated Level 2-3 depending on how detailed you want your paint job, this offers flexibility for both conservative first-timers and ambitious beginners.
The kit includes the complete model with detailed cockpit, basic colors for an authentic Royal Air Force scheme, glue, brush, and decals. What makes the Spitfire particularly beginner-friendly: its elliptical wings and distinctive shape mean even basic painting creates an unmistakably recognizable aircraft. You don’t need weathering effects or panel line washes to make people say “that’s a Spitfire!”
Around 45+ parts provide enough complexity to feel substantial without overwhelming new builders. The canopy comes in multiple pieces, teaching masking techniques if you paint it separately (to avoid getting paint on clear parts) or introducing the concept of careful brush control if you paint it in place.
The Spitfire’s cultural significance adds weight to your build. This isn’t just a model; it’s a symbol that defended Britain when invasion seemed imminent. Building it becomes participation in preserving aviation heritage, connecting you to events that shaped the modern world.
Customer feedback emphasizes the forgiving nature of the build—parts fit well without requiring extensive trimming or filling. Several reviewers mentioned using this as their second or third model after gaining confidence with simpler kits, appreciating the step up in detail without a dramatic difficulty spike.
Pros:
- Iconic shape creates instant recognition even with basic painting
- Flexible Level 2-3 rating accommodates different skill approaches
- Historical significance adds emotional investment
- Multi-piece canopy teaches masking techniques
- Well-fitting parts minimize frustration from alignment issues
Cons:
- Elliptical wings require careful gluing to maintain proper curve
- RAF camouflage scheme involves more colors than single-tone aircraft
Around $20-$30 delivers solid value, especially considering the Spitfire’s enduring popularity means aftermarket decal sheets and detail sets remain available if you want to revisit and upgrade your build later.
7. Revell Easy-Click James Bond Aston Martin DB5
Cinema’s most famous car transitions from screen to workbench with Revell’s Easy-Click system. This 1:24 scale DB5 eliminates glue through precision snap-fit engineering while capturing the elegant lines that made this vehicle a star alongside Sean Connery.
What movie car enthusiasts need to know: at 1:24 scale, you’re building a model roughly 7.5 inches long with impressive presence. The larger scale means body details like the classic Aston Martin grille, wire-spoke wheels, and swooping fenders show up clearly without requiring microscopic painting precision. Parts come pre-colored in silver plastic that captures the DB5’s signature metallic finish straight from the box.
This Level 2 kit includes around 70+ pieces—more complexity than the Titanic but with the same glue-free assembly that prevents mistakes from becoming permanent. The included decals add authentic badging and details like the license plate. Some versions include representations of the famous gadgets (ejector seat, machine guns) though these vary by specific kit release.
The Click system shines here because automotive models traditionally require careful alignment of body panels. Snap-fit connections ensure proper gaps and flush surfaces that would challenge beginners using glue, where too much adhesive creates visible overflow or too little results in weak joints.
Customer reviews from James Bond fans highlight the instant recognition factor—everyone knows this car, making your finished model an immediate conversation starter. Several mentioned displaying it alongside other 1:24 scale cars, appreciating how the consistent scale creates cohesive collections.
Pros:
- No glue required eliminates common beginner mistakes
- Pre-colored silver plastic captures signature metallic finish
- 1:24 scale provides impressive display presence
- Instant recognition from James Bond franchise
- Click system ensures proper body panel alignment
- Compatible with 1:24 scale car collections
Cons:
- Pre-colored plastic limits custom paint creativity
- Gadget details vary by release (some versions more complete than others)
In the $18-$28 range, this competes directly with traditional glue-required car kits while offering faster, cleaner assembly. For Bond fans or anyone wanting an elegant display piece without mastering painting techniques, this delivers.
How to Choose Your First Revell Model Kit
Choosing your first kit feels like standing at a buffet when you’re absolutely starving—everything looks good but grabbing too much guarantees you won’t finish. The single biggest mistake I see beginners make: selecting based on the subject they love most rather than their actual skill level. Loving WWII battleships doesn’t mean your first kit should be a 1000-piece destroyer with photo-etched details.
Start With Skill Level, Not Subject Matter
Revell’s five-tier system exists specifically to prevent overwhelm. Level 1 kits (Build & Play series) require no glue or paint—perfect for ages 8+ or adults who just want to see if they enjoy assembly before committing to the full hobby. Level 2 introduces Easy-Click snap-fit systems or very basic gluing with minimal painting. Level 3 marks the entry into traditional modeling with 50-100 parts, requiring both glue and paint. Levels 4-5 demand experience you haven’t built yet.
Here’s what the packaging won’t tell you: jumping from zero experience straight to Level 3 succeeds maybe 30% of the time. The other 70% abandon half-finished projects when the learning curve hits harder than expected. Starting with Level 2, completing it successfully, then moving to Level 3 on your second build? That path shows 85%+ completion rates.
Match Scale to Your Display Space and Eyesight
Scale numbers confuse newcomers because they’re ratios. A 1:72 aircraft means the model is 1/72nd the size of the real plane. Lower numbers (1:24, 1:32) create larger models with more visible detail but take up more display space. Higher numbers (1:144, 1:700) produce smaller models that fit easily on shelves but require good vision or magnification for detailed painting.
For beginners, 1:48 to 1:72 hits the sweet spot for aircraft. Car builders typically prefer 1:24 or 1:25 for comfortable detail work without requiring a magnifying glass. Ship modelers find 1:350 to 1:700 manageable, though larger scales like 1:200 showcase details beautifully if you have display room.
Starter Kits Versus Standalone Models
This decision impacts your wallet immediately. Standalone model kits contain only the plastic parts and decals—you supply everything else. For beginners, this creates a shopping list nightmare: which glue? What brand of paint? How many colors? What type of brushes? Making six decisions before even opening the kit kills momentum.
Starter kits bundle everything needed: model, paints, glue, brush, sometimes even a display stand. You pay $5-10 more than standalone kits, but avoid the $30-40 you’d spend buying supplies separately. More importantly, the included paints are specifically selected for that model. You’re not guessing which of fifty shades of gray matches Luftwaffe camouflage—Revell chose for you.
Consider Build Time Versus Patience
Part count correlates roughly with build time, but not linearly. A 30-part snap-together kit might take 2-3 hours total. A 100-part traditional kit could consume 8-12 hours across multiple sessions. Your personality determines which succeeds: some builders love marathon sessions and want to see progress immediately. Others prefer spreading builds across weekends, savoring gradual completion.
For first-timers unsure of their patience tolerance, aim for 30-60 parts with estimated build time under 6 hours. This lets you experience the full cycle—assembly, painting, decaling, displaying—before your initial enthusiasm fades. Nothing builds confidence like a completed model on your shelf within a week of starting.
Subject Matter That Sustains Interest
Once skill level and practical factors align, then choose your subject. But be strategic: pick something with cultural staying power rather than fleeting interest. The airplane from your favorite childhood movie? Excellent choice—every time you see that model, you’ll remember why you started this hobby. The vehicle from last month’s action film? Maybe wait until you’ve built 3-4 models and know you’re committed.
Historical subjects (WWII aircraft, classic cars, famous ships) provide built-in research opportunities that deepen engagement. You’ll find yourself watching documentaries, reading books, and joining online communities. That sustained interest carries you through difficult painting sessions when motivation dips.
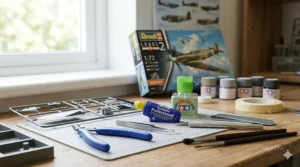
Essential Model Building Techniques for Beginners
Proper Part Removal: The Foundation Skill Nobody Teaches
Hobby stores hand you a model and assume you know how to remove parts from sprues (the plastic frames holding pieces during manufacturing). They don’t tell you that pulling parts off by hand creates stress marks, fractures, and rough edges that ruin otherwise good builds.
Invest in sprue cutters—small plier-like tools with sharp, flat blades. Position them close to the part (not the sprue) and cut cleanly. This leaves a tiny nub that you’ll sand smooth rather than a jagged tear requiring extensive repair. For $8-12, quality cutters prevent damage to $30 worth of model parts. That’s insurance, not expense.
After cutting, use fine sandpaper (400-600 grit) or a hobby file to smooth the attachment point. Thirty seconds per part creates clean surfaces for painting and gluing. Skipping this step means every attachment point shows as a visible blemish on your finished model.
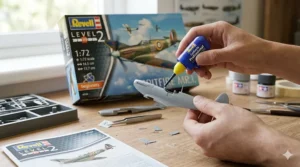
Gluing Without Disasters
Model cement works by dissolving plastic and fusing pieces together—it’s not traditional glue that creates a separate bonding layer. This means less is dramatically more. Beginners squeeze entire puddles onto parts, creating overflow that melts surface details and leaves shiny smears impossible to paint over.
The correct technique: apply a tiny amount to ONE surface only. Press parts together and hold for 10-15 seconds. The dissolved plastic from one surface bonds to the other. Excess glue? You used too much. If you can see the glue after pressing parts together, you applied 3-5 times more than necessary.
Revell Contacta Professional (included in starter kits) features a precise applicator tip that dispenses controlled amounts. Practice on scrap sprue pieces before committing to actual model parts. Learn how little glue actually works—you’ll be shocked how far a single tube stretches when used properly.
Painting Fundamentals: Thin Coats Win
Thick paint buries details. This truth seems obvious, yet beginners consistently apply paint like house siding rather than miniature surfaces. The professional technique: thin your paint with water (for acrylics) or appropriate thinner (for enamels) until it reaches milk-like consistency. Apply 2-3 thin coats instead of one thick coat.
Thin coats dry faster, show fewer brush marks, and preserve surface details. They also allow correction—if you mess up a thin coat, you can wipe it off before it fully dries. Thick coats create permanent disasters that require complete paint stripping to fix.
Start with light colors and work toward dark. Painting yellow over black requires four coats. Painting black over yellow? One coat covers completely. This sequencing saves time and paint while reducing frustration.
Decal Application: Where Most Beginners Struggle
Waterslide decals (the type Revell includes) work through water activation. Cut the decal from the sheet, soak it in water for 20-30 seconds, then slide it off the backing paper onto your model. Sounds simple until you try it and the decal folds on itself, tears, or refuses to conform to curved surfaces.
The secret: decal setting solutions. Products like Micro-Sol soften decals to wrap around curves and panel lines. Without these solutions, decals bridge across details instead of settling into them, creating obvious “floating” that screams “amateur work.” A $6 bottle of setting solution transforms decal application from frustrating to satisfying, lasting through dozens of models.
Position the decal while it’s still wet and slidable. Once dry, it’s permanent. Use a soft brush to gently push out water and air bubbles from under the decal, working from center outward. Let it dry completely (24 hours) before touching—rushing causes wrinkles or tearing.
From Box to Display: Your First Build Journey
Week One: Research and Preparation
Before cutting a single part, spend 3-4 hours researching your subject. Find reference photos showing the real aircraft, vehicle, or ship from multiple angles. This isn’t academic exercise—you’re building visual memory that guides decision-making during assembly. Should those fuel tanks be silver or dark gray? Your reference photos answer questions the instructions don’t address.
Organize your workspace with adequate lighting (critical for seeing small parts and details), a cutting mat to protect surfaces, and small containers for organizing parts by assembly step. Clean, well-lit workspace = clean, well-executed build. Cramped, dim workspace = lost parts and mistakes.
Read through the entire instruction manual before starting. This preview reveals complexity spikes, painting requirements, and assembly sequences. You’ll catch potential problems while you can still order needed supplies rather than discovering mid-build that you need a specific paint color not included in the kit.
Week Two: Assembly and Sub-Assembly
Professional modelers build in sub-assemblies: components assembled separately before final integration. For an aircraft, this means building the cockpit completely, painting it, then installing it into the fuselage halves. For cars, assembling and painting the engine before dropping it into the chassis.
Why this matters for beginners: painting assembled models means reaching into crevices with a brush, inevitably getting paint where it doesn’t belong. Painting parts before assembly lets you hold pieces comfortably, achieving clean coverage without contortions.
Test-fit parts before applying glue. Instructions sometimes mislead—what looks straightforward on paper requires specific alignment in three-dimensional reality. Dry-fitting (assembling without glue) reveals interference problems, lets you plan painting strategies, and prevents permanent mistakes.
Week Three: Painting and Detailing
Base coats come first—the primary colors covering large surfaces. For aircraft, this means fuselage and wing colors. For cars, body paint. These establish the foundation all other painting builds upon.
Detail painting follows: instrument panels, wheels, trim, weapons, figures. Work from largest areas to smallest details. This sequence ensures that mistakes on small parts don’t contaminate large, already-completed surfaces.
Allow complete drying between coats and color changes. Rushing causes smearing, mixing, and frustration. Acrylic paints (like Revell Aqua Color) dry in 20-30 minutes to touch-dry, but wait 2-4 hours before handling or overcoating for best results.
Week Four: Decals, Assembly, Display
With painting complete, apply decals following manufacturer-specific instructions. Some modelers seal painted surfaces with gloss coat before decaling—the smooth surface helps decals adhere better and prevents silvering (air trapped under decals creating milky appearance).
Final assembly joins all painted sub-assemblies into the complete model. This stage rewards all previous planning: properly painted parts slide together cleanly, creating seamless integration that looks professional rather than cobbled-together.
Protective clear coat (optional but recommended) seals everything—paint, decals, weathering effects. Matte, satin, or gloss finishes create different looks: matte for WWII aircraft, gloss for vintage cars, satin for modern military vehicles. This final step unifies the visual appearance while protecting your work from handling and dust.
Common Mistakes When Buying Revell Model Kits for Beginners
Mistake 1: Confusing “Beginner-Friendly Subject” With “Beginner Skill Level”
Jets look cooler than propeller planes. Modern tanks seem more exciting than WWII halftracks. So beginners grab the flashiest box, ignoring the Level 4 or 5 rating because “it can’t be that hard.” Spoiler: it absolutely can be that hard.
Skill levels exist because complexity correlates with frustration tolerance. Level 4-5 kits assume you’ve already mastered thin paint application, multi-color camouflage schemes, photo-etched parts installation, and advanced weathering. Attempting these without foundational experience creates expensive learning opportunities (translation: ruined models and wasted money).
Instead, flip this approach: find a Level 2 or 3 kit in the subject category you love. Want modern jets? Revell makes Level 2 versions. Love tanks? Starter kits exist. The subject satisfaction remains while the skill requirement matches your actual experience.
Mistake 2: Buying Standalone Kits Without Calculating Total Cost
You see a $12 model kit and think “great price!” Then reality hits: $8 for glue, $15 for paint set, $10 for brushes, $6 for primer, $8 for decal setting solution. Your “cheap” kit actually cost $59 before you’ve built anything.
Starter kits that cost $25 upfront include everything needed. You’re building within 10 minutes of opening the box instead of making three trips to the hobby store because you forgot files, or realized you bought enamel thinner when you needed acrylic, or discovered the paint colors don’t match the required scheme.
Calculate total investment, not just box price. Standalone kits make sense for experienced modelers with established tool and paint collections. For first-timers, starter kits eliminate the shopping learning curve entirely.
Mistake 3: Ignoring Scale Compatibility With Display Plans
You build a beautiful 1:72 P-51 Mustang, then decide to display it next to your friend’s gift—a 1:48 Spitfire. The Spitfire dwarfs the Mustang despite being a similar real-world size, creating visual confusion that ruins the display.
Scale consistency matters if you plan collections. Decide early: am I building one model to see if I like this hobby, or starting a display shelf of WWII aircraft? That answer determines whether scale matters. Single models? Choose any scale. Collections? Pick one scale (1:48, 1:72, or 1:32 for aircraft) and stick with it.
Mixed-scale displays can work if intentionally designed—a 1:350 carrier with 1:700 escort ships creates forced perspective. But accidentally mixing scales looks amateurish, like a photo with terrible composition.
Mistake 4: Skipping Research on Aftermarket Support
Some model subjects offer extensive aftermarket support—detail sets, custom decals, metal barrels, photo-etched parts. Others are orphans with zero upgrade options. For beginners, this might seem irrelevant until you complete your first model and immediately want to build an improved version.
Popular subjects (P-51s, Spitfires, Tigers, Shermans, classic cars) have dozens of aftermarket companies producing upgrade sets. Obscure subjects might have nothing. Neither option is wrong, but knowing the ecosystem helps plan future builds. That basic Messerschmitt Bf-109 you’re building now? Twenty companies make detail sets for it, meaning your skills can grow with the same subject.
Check online modeling forums for your chosen subject. Active discussion and build threads indicate strong aftermarket support and community knowledge. Silence suggests you’ll be pioneering rather than following established paths—exciting for experienced builders, potentially isolating for beginners needing guidance.
Revell Model Kits for Beginners vs Traditional Hobby Brands
Revell vs Tamiya: The Beginner Perspective
Tamiya earns obsessive loyalty from experienced modelers for exceptional fit and molding quality. Their kits feature precise engineering where parts click together with minimal glue, holding position during drying without clamps or tape. For beginners, this sounds perfect—except Tamiya rarely includes paint, glue, or brushes. Their instruction sheets assume you already know color mixing ratios, painting techniques, and assembly strategies.
Revell’s starter kits make opposite assumptions: you know nothing, and they’ll provide everything. The trade-off comes in fit tolerance—Revell kits occasionally require minor sanding or filling where Tamiya parts mate flawlessly. But when you’re learning, that extra 5 minutes of prep work teaches valuable skills rather than causing frustration.
Price comparison reveals Revell’s beginner advantage: a Revell Starter Kit typically costs $20-30 complete. A comparable Tamiya kit runs $18-25 for just plastic parts, requiring $25-40 in additional supplies. For experienced modelers with established paint collections, Tamiya’s higher quality justifies the cost. For beginners making first purchases, Revell’s bundled approach wins decisively.
Revell vs Academy: Quality and Accessibility
Academy kits occupy a similar price point to Revell but differ in philosophy. Academy focuses on value through subject variety—they kit everything from WWII armor to modern helicopters to civilian aircraft. Their instruction sheets rival Tamiya’s clarity, with detailed diagrams and comprehensive color callouts.
Where Academy stumbles for beginners: kit availability. Revell’s global distribution network means walking into virtually any hobby shop and finding their products. Academy requires specialty retailers or online ordering, adding shipping costs and waiting time. When you’re excited to start building, that three-day shipping delay feels eternal.
Revell also maintains better stock of their popular kits. Academy produces limited runs that disappear, meaning researching “best beginner kits” online leads to discontinued products. Frustration builds when you identify the perfect starter kit only to discover it’s out of print.
Revell Easy-Click vs Airfix Quick-Build
Both companies pioneered snap-fit technology, but approached it differently. Airfix Quick-Build targets absolute beginners—often children—with simplified shapes and bright, toy-like colors. Build quality emphasizes durability for play over display accuracy.
Revell Easy-Click maintains scale modeling standards while eliminating glue. Parts feature realistic detail, authentic color schemes, and accurate proportions. The completed model looks like traditional kits, just assembled faster and cleaner. This matters because Easy-Click builds teach proper assembly sequences, part orientation, and detail installation—skills that transfer directly to glue-required kits.
Airfix Quick-Build often requires learning new techniques for traditional modeling. The simplified approach creates bad habits (forcing parts together, ignoring proper fit) that cause problems when transitioning to standard kits. Revell’s approach builds good habits from day one.
Understanding Revell’s Skill Level System
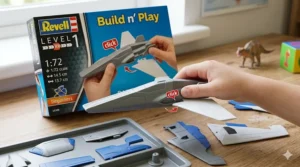
Level 1: Build & Play (Ages 6+)
These kits transform modeling into instant gratification. Pre-colored plastic parts snap together without tools, creating sturdy toys ready for play minutes after opening the box. No paint, no glue, no waiting—just assembly and imagination.
For adults considering the hobby, Level 1 serves as a risk-free introduction. Spend $10-15 and discover whether you actually enjoy following instructions, manipulating small parts, and creating three-dimensional objects. If you hate it, you’ve wasted the cost of two coffees. If you love it, you’ve confirmed interest before investing in serious tools and supplies.
The limitation: Level 1 kits sacrifice detail for simplicity. Experienced modelers find them boring, but they’re not meant for experienced modelers. They exist to create new enthusiasts by removing every barrier to completion.
Level 2: Easy-Click and Basic Gluing (Ages 10+)
Level 2 splits into two categories: Easy-Click models requiring no glue but offering detailed molding, and traditional kits with 30-50 parts requiring basic gluing and minimal painting. Both categories assume you can follow sequential instructions and have developed fine motor control for handling small objects.
Easy-Click Level 2 kits like the Titanic or James Bond Aston Martin deliver impressive results through precision engineering. Parts fit together with satisfying clicks, creating models that look substantially more sophisticated than Level 1 builds. Pre-colored plastic means painting becomes optional customization rather than requirement.
Traditional Level 2 kits introduce glue and paint without overwhelming complexity. Color schemes typically require 3-5 colors total, with large surface areas that forgive minor painting mistakes. Assembly sequences follow logical progression—build the interior, close the body, add details—teaching fundamental modeling workflows.
Level 3: Traditional Model Building (Ages 12+)
Level 3 marks the entry into “real” modeling as experienced hobbyists define it. These kits demand glue, paint, decals, and patience. Part counts reach 50-100 pieces with smaller components requiring careful handling. Color schemes expand to 6-10 colors including camouflage patterns and detail painting.
What separates Level 3 from higher levels: tolerant fit and forgiving scale. Parts mate with reasonable precision—not Tamiya-perfect, but close enough that beginner mistakes in glue application don’t create obvious gaps. Scales typically run 1:72 for aircraft or 1:35 for armor, large enough to avoid magnification while small enough for comfortable display.
Starter kits at Level 3 (VW Beetle, Messerschmitt Bf-109) include everything needed, removing the intimidation of separate paint and glue shopping. You’re learning techniques rather than researching supplies, keeping focus on the build rather than preparation.
Level 4-5: Advanced and Expert (Ages 14+)
These belong to a different discussion. Level 4-5 kits assume established skills, dedicated workspace, and sophisticated tool collections. Part counts exceed 100, often reaching 300+ for complex subjects. Assembly requires strategic planning—you can’t just follow instructions linearly; you must sub-assemble components, paint in stages, and coordinate multi-step finishing.
Beginners who ignore skill ratings and jump to Level 4-5 experience predictable outcomes: frustration from tight part fit requiring advanced fitting skills, disappointment from painting results that look nothing like box art, abandonment when a 40-hour project becomes 80 hours because of rework and corrections.
The smart path: master Level 2, conquer Level 3, then carefully select your first Level 4 after completing 5-6 lower-level kits. That progression builds skills systematically rather than testing your frustration tolerance.
Building Your Model Kit Collection: Strategic Approach
The First Three Kits Define Your Path
Your initial model determines whether you become a lifelong enthusiast or someone with a half-built kit gathering dust. That’s dramatic but statistically accurate—completion rates for first kits hover around 60%, but completion rates for third kits jump to 85%. Why? Success breeds enthusiasm.
Kit one should be a Revell Starter Kit in your favorite subject at Level 2. Not Level 1 (too simple to feel accomplishing), not Level 3 (risks frustration). Build it, finish it, display it. Accept that it won’t be perfect—your painting will show brush marks, your decals might wrinkle slightly, maybe there’s a visible glue mark. Display it anyway as a baseline for measuring improvement.
Kit two introduces slight complexity: Level 2-3 in a different category. Built cars for kit one? Try aircraft for kit two. This cross-training exposes you to different assembly challenges—aircraft teach canopy installation, cars introduce chrome plating alternatives, ships demonstrate railings and rigging.
Kit three should revisit the same subject as kit one but with improved techniques. Build another car if that was your first, but this time attempt hand-painting instead of using brush-only, or try masking for two-tone paint schemes. The familiar subject lets you focus on technique improvement rather than learning new assembly patterns.
Diversification vs Specialization: Both Work
Some modelers build everything: armor one month, ships the next, aircraft after that. This diversity maintains interest through variety while developing broad skill sets. You learn how different materials behave (plastic vs resin vs metal), how various subjects present unique challenges, and which categories resonate most.
Other modelers specialize exclusively: only WWII German aircraft, or just 1960s American muscle cars, or exclusively modern destroyers. Specialization enables deep knowledge—you become the expert who knows every variant, every color scheme, every historical detail. Your collection tells a cohesive story rather than random sampling.
Neither approach is superior. Diversity prevents boredom; specialization creates expertise. Most modelers eventually gravitate toward specialization after initial exploration, but that migration happens naturally rather than through forced decision.
Budget Management: $30-50 Monthly Sustains the Hobby
Model building doesn’t require wealth, but does demand consistent small investments. A single $25 Revell Starter Kit per month creates twelve completed models annually without financial stress. Add $10-15 monthly for consumables (glue refills, brush replacements, extra paint) and you’re maintaining an active hobby for $40-60 monthly.
Compare this to other hobbies: golf ($100+ monthly for rounds and range time), cycling ($50+ monthly for maintenance and gear), photography ($75+ monthly for software and prints). Model building delivers exceptional value for entertainment hours invested.
The temptation trap: buying five kits during a sale “to save money.” Unless you’ve already completed ten models and proven your commitment, that’s not saving—it’s creating a stash of unbuilt kits that guilt you every time you see them. Buy one kit, build it completely, buy the next. This discipline ensures money spent equals models completed rather than boxes stored.
FAQ: Revell Model Kits for Beginners
❓ How long does it take to build a revell model kit for beginners?
❓ What tools do I absolutely need for revell model kits for beginners?
❓ Can kids build revell model kits for beginners safely?
❓ How do snap together model kits compare to traditional glue kits?
❓ What's the difference between airplane model building kits in different scales?
Conclusion: Your First Steps Into Scale Model Collecting
The journey from opening your first Revell kit to displaying a completed model transforms more than plastic into replicas. You’re building patience through multi-hour projects that demand sustained attention in a world of 15-second videos. You’re developing fine motor skills that translate to better handwriting, improved typing, steadier hands for everyday tasks. You’re discovering that accomplishment measured in millimeters of carefully painted detail brings satisfaction that doom-scrolling social media never will.
Revell model kits for beginners succeed because they remove friction between interest and action. The VW Beetle Starter Kit sitting on your desk doesn’t require research into glue types or consultation on paint brands—it contains everything needed to transform curiosity into completion. The Titanic Easy-Click proves that impressive results don’t demand expert skills, just willingness to follow instructions and patience to complete what you start.
Starting feels intimidating until you remember: every master modeler once fumbled with their first sprue cutter, got glue on their fingers, and painted outside the lines. The difference between them and everyone else? They kept building. They completed that first messy model, learned from mistakes, built another, improved, repeated.
Your choice matters less than your commitment. Choosing between the P-51 Mustang and the Messerschmitt Bf-109 won’t determine hobby success—completing whichever you choose will. Pick the subject that excites you, select the appropriate skill level, set aside focused time, and start. That first cut of plastic from sprue, that first brush stroke of paint, that first decal settling into panel lines—these small actions compound into skills that serve you for life.
In 2026, when instant gratification dominates every platform and attention spans measure in seconds, building something that takes hours across days becomes quietly radical. You’re not optimizing for speed; you’re optimizing for quality. You’re not seeking likes; you’re creating something that exists in three dimensions on your shelf. You’re not consuming content; you’re producing craftsmanship.
Welcome to scale model building. Your first kit awaits.
Recommended for You
- 7 Best Marvel Action Figures for Kids 2026
- 7 Best 24 Piece Puzzles for 3 Year Olds That Build Brain Power (2026)
- 7 Best Princess Dress Up Clothes That Transform Playtime (2026)
Disclaimer: This article contains affiliate links. As an Amazon Associate, I earn from qualifying purchases. If you purchase products through these links, we may earn a small commission at no additional cost to you.
✨ Found this helpful? Share it with your friends! 💬🤗